

For many years, almost everyone installed vCenter on Windows. This was mainly due to the increased scale of the Windows platform over the appliance. Nobody wanted to install the inferior appliance version unless it was in a lab. But over the last few years the gap has closed and now they are on par with each other. So when you take into account Windows and SQL licensing costs, and the single platform for support to fix in case of issues it’s a bit of a bit of a no brainer now to switch to the appliance version. You’ll be glad to hear that there is even a tool in the latest version to help you migrate over from Windows to appliance.
VMware has included some pretty cool new features in the latest version, such as High Availability, something people have been crying out for, for a long time.
Here’s a rundown on how to install and configure it:
1.First of all, the installation relies heavily on DNS being correct so make sure your DNS is working and add an entry for the new vCenter and make a note of it’s address. The install itself isnt your typical OVF deployment. It’s still the same as it was in v6, where you run an installer from either Windows, MAC or linux. We’ll go with the most common version which is Windows. Insert the CD or mount the downloaded ISO.
2.Browse to vcsa-ui-installer, then go into the win32 folder
3.In here you should see the installer.exe. Double click this to begin the installation.
4.The gui wizard will begin with the introduction page. Click ‘next’ to continue
5.Tick the box to accept the license agreement and click’next’
6.At step 3 of the wizard you need to make a key architectural decision. You have several options but they all centre around vCenter and Platform Services Controller. The first and easiest option is to run the embedded version which puts them both in a single appliance. However, depending on what sort of availability and load balancing you require, you could choose to run the two on seperate appliances, add load balancing etc to make the solution more highly available by scaling out multiple appliances. For the purposes of this post, i will choose embedded but i will write a separate post on this choice later. Click ‘next’ to continue.
7.Next you must tell the wizard which ESXi host (or vCenter) you want to point the installer to. If this is your vCenter you’ll have to choose the host. Enter the name or ip address and add the credentials, then click ‘next’.
8. You will receive a certificate warning. Click ‘yes’ to coninue.
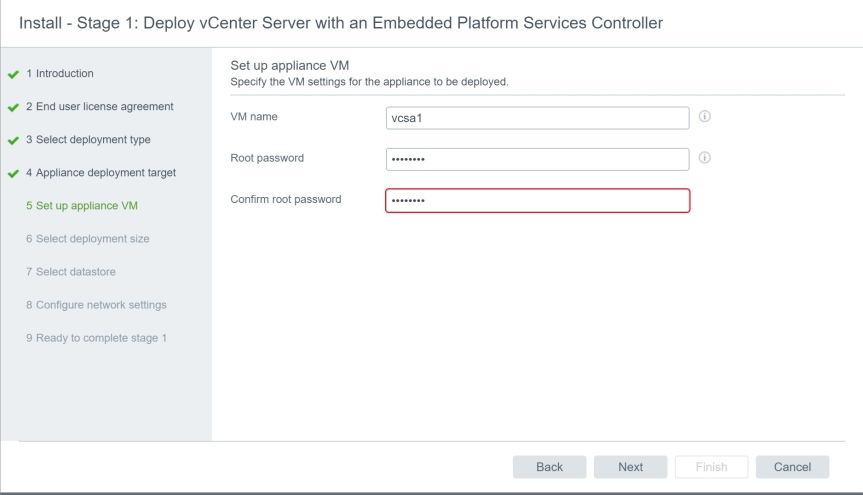
9. Give the appliance a name and set a password, then click ‘next’
10. Step 6 allows you to set the deployment size. Use the table below to try and map it to your environment. eg if you have 200 hosts, select ‘small’ and if you have 5000 virtual machines, select ‘large’. Don’t worry too much about the vCPU, memory and storage as depending on which you choose, this is adjusted for you. This info is more just to give you an idea of how your selection will use more or less resources. Once you’ve chosen, click ‘next’.

11. Chose the datastore you want to install on, and if required select thin disk mode. This is not always recommended for production systems for performance reasons but can be chosen if disk space is tight. Click ‘next’.

12. Enter an FQDN name for your appliance and add all the relevant ip details, then click ‘next’

13. Now you’ll receive a summary of all your settings. Check they are all ok at this point and if you’re happy with them, click ‘finish’.

14. The deployment will begin. Depending on your client, host and network speed, this can take a little while.

15. Once the deployment is complete, click ‘Continue’

16. Now we’ve deployed the appliance, we need to configure it. Click ‘next’ to continue to stage 2 of the installation.

17. Enter your NTP server address/s and if you want to enable ssh on the appliance, do that here. click ‘next’.

18. Enter an SSO domain name and credentials. Make this different to your AD name. The default is vsphere.local. Add a site name and click ‘next’

19. Choose whether you want to participate in the improvement program, then click ‘next’

20. Review all your settings and click ‘finish’

21. Click ‘ok’ to continue when you receive the warning.

22. Again the config can take a few minutes. Be patient and wait for it to complete.

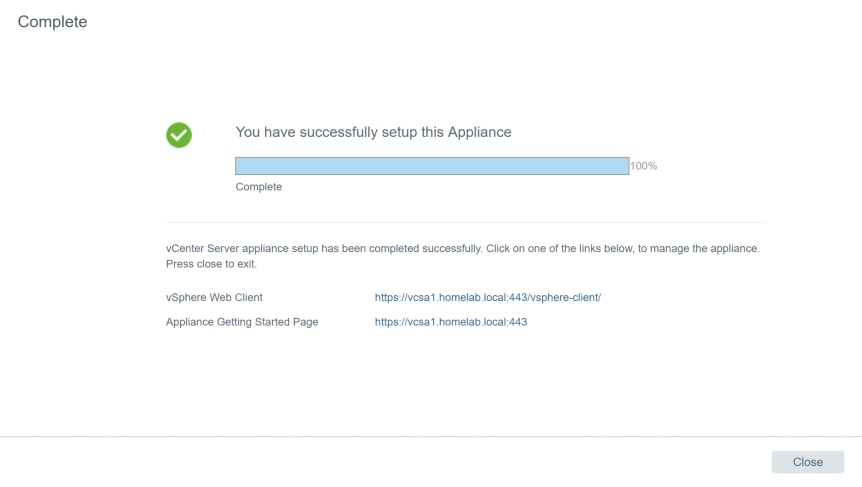
23. Once it completes you should see the screen below. Click ‘close’.
24. Before we get logged into the main console, lets connect to the configuration port and take a look at the configurations options. You can get to it on port 5480. eg https://vcsa.domain.com:5480. You should see a screen like this. Enter your root username and password to login.

25. Once you’re in, you’ll see a menu down the left and to the right, the summary page. This will show you details like the version and health of the appliance. From the top right of this page you can also create support bundles should VMware support request them. You can also perform backups, reboots and shutdown the appliance from here too.

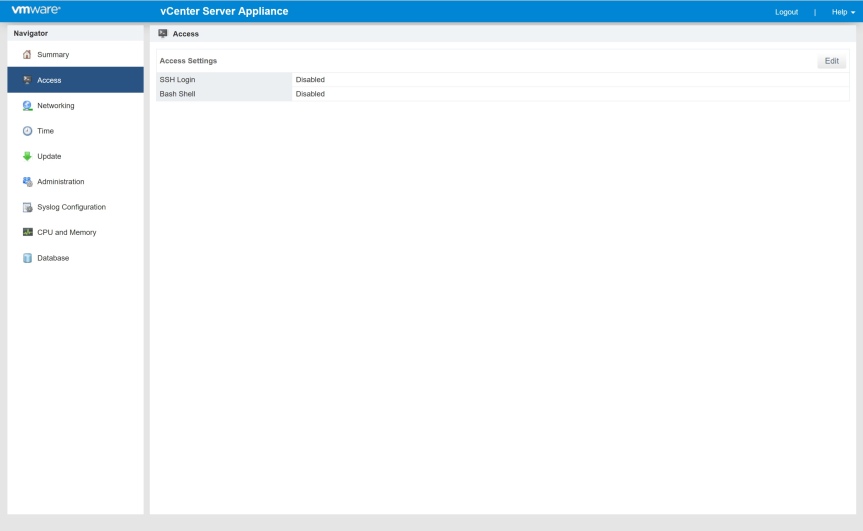
26. Moving down the menu, under ‘access’ we can enable ssh and bash if required.
27. Next we have ‘networking’. From here we can monitor the appliance and review statistics. If you click ‘manage’ you can also do things like change hostname and ip details.

28. ‘Time’ is next. As you’d expect, you can change time zone, time and NTP settings here.

29. Update is where you can perform an appliance update. There is a ‘check update’ button in the top right. Periodically you should come here to check for updates. Under settings you can choose to apply these automatically if so required.

30. Next we can change appliance password and policy settings.

31. Syslog can be configured to send to a remote syslog server, if required.

32. CPU and Memory as expected allows you to review the performance of the appliance. This can be useful when troubleshooting.

33. Database shows you statistics of the internal postgres DB.

34. So that’s the configuration console. Let’s take a look at vCenter itself now. Open a new browser tab, this time just enter the address eg. https://vcsa.domain.com. Here you can log into vCenter via the getting started page, or https://vcsa.domain.com/vsphere-client to bypass the getting started page.
If you look at the black bar along the bottom of the screen, you’ll see a link to download the enhanced authentication plugin. This replaces the version 6 client integration plugin. This provides integrated windows and smart card authentication. Click on the link, and when you see this prompt, click save file.
35. Once the download is complete, do to the download folder and double click the exe. Click Ok on the warning.

36. Then when you see this warning, just click ok again. This is just warning you that two installers will run in succession.

37. Click Next on the welcome screen for the authentication plugin.
38. Click the radio button to accept the license agreement and click next.
39. Change the path if required and click next.
40. Click install to begin the installation.
41. After a few seconds the install will complete. Click Finish

42. Now the plugin service installer will kick off straight away. Click next to continue
43. Click the radio button to agree to the EULA and click next
44. Change the path again if required and click next.
45. Click install to begin the installation
46. A cmd prompt window will appear for a few seconds and run some scripts. After this, click finish to complete the installation.

47. After this is done. Close your browser and re-open it. You should see a pop up like this to say its enabled. Click ok, then restart the browser and go back to the vCenter URL.
48. Now when the page loads the black banner at the bottom of the page should have disappeared. Enter your administrator address in the format in the screenshot, using your domain name. Then enter the password and click ‘login’.

49. Once you’re logged in you should see a screen like the one below. You’ll notice a yellow banner across the top of the screen warning you that need to apply a license key. Click the ‘manage your licenses’ link.
50. Click on the ‘1. manage your licenses’ link
51. Click the green plus symbol to add a new license key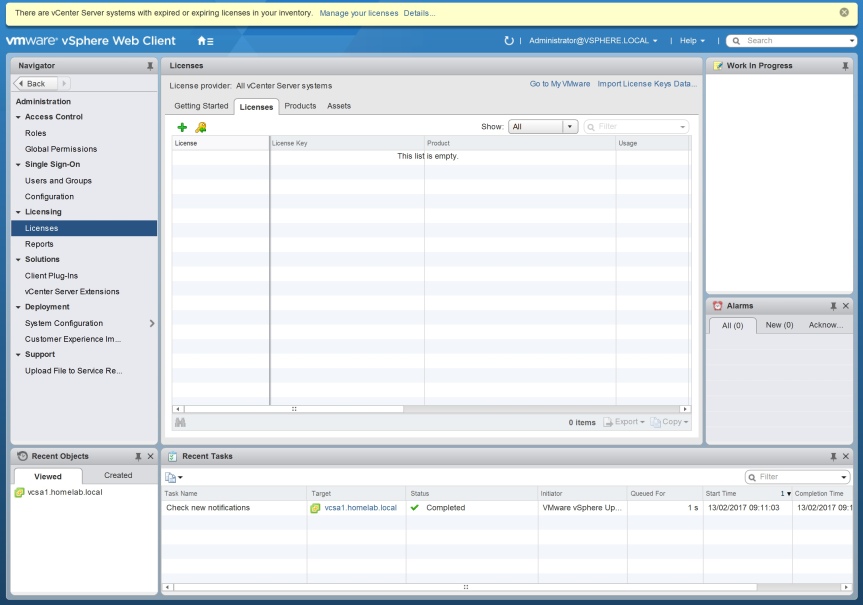
52. a new windows will open. Paste your license key in here and click next. It’s a good idea whilst you’re in here to not only add the vCenter key but also , any others you have such as keys for hosts too.
53. Give the license a name and click next. This is just a reference and can be whatever you like.
54. You should then see a summary screen. If you’re happy with the entries, click finish.
55. Back in the main window, you will your license key is now listed. Click the assets tab so we can assign it.
56. In the assets tab you’ll see a further set of tabs for vCenter, hosts, clusters and solutions. Click vCenter server systems and you should see your vCenter. Click on it.
57. Then click the all actions button and select assign license.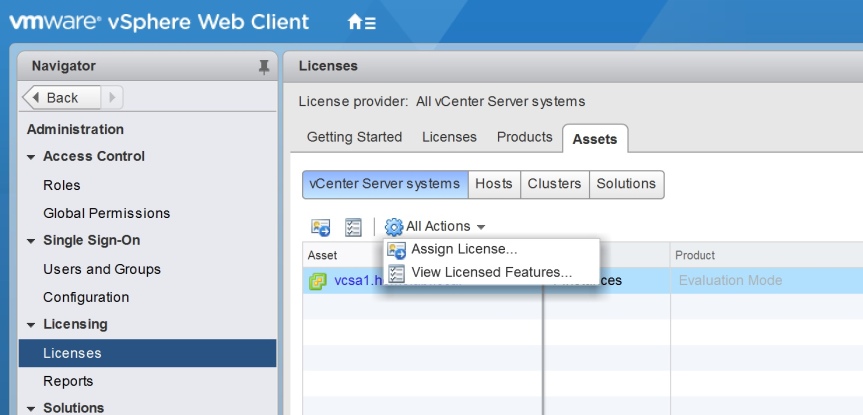
58. Select the license key from the list. It should have the name you gave it, then click ok.
59. Back on the main windows it should now list your vCenter as being licensed ok.
60. Go back to the homepage. Now its time to start creating some structure. First we need to create a datacenter so click the link in the blue box.
61. Give the datacenter a name and click ok.
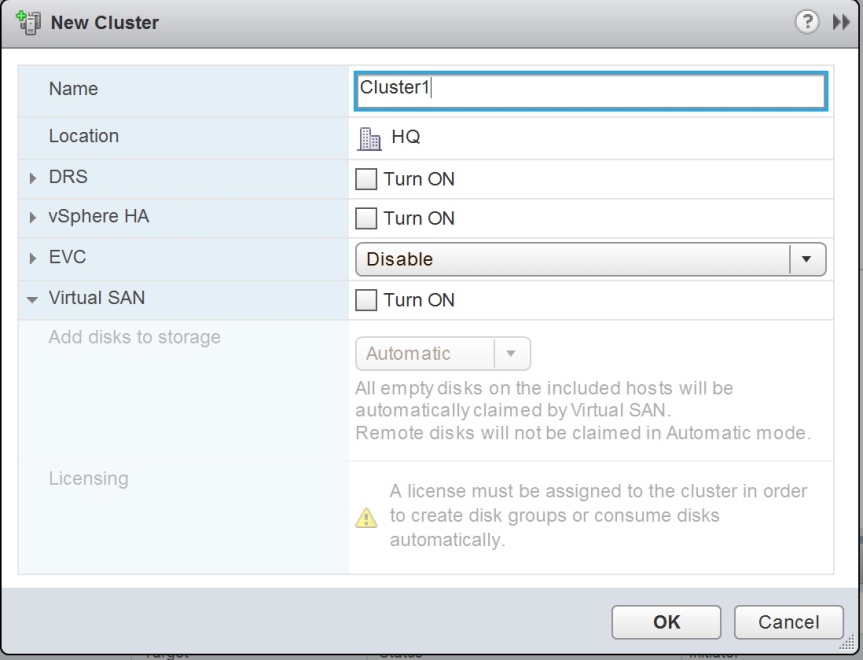
62. You should see your new datacenter in the left hand side. Click on it and then click the blue box where it says ‘create a cluster’
63. Give your new cluster a name and enable any features you want, then click ok.
64. Then on the main screen click on the cluster you’ve just created and click the blue link to add a host. Give the host a name and click next
65. Enter the roor user and password for the host. This is to enable vCenter to create what it needs to connect, then click next.
66. If prompted about the certificate, click yes to continue.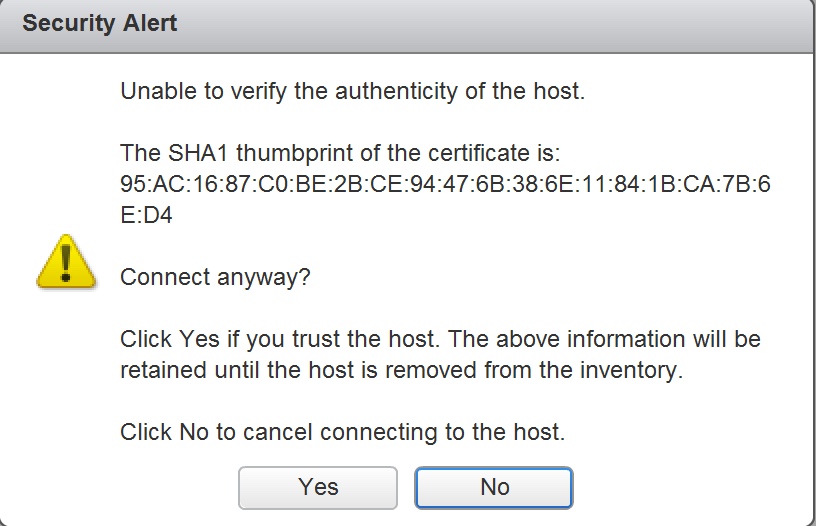
67. Check the summary screen and click next.
68. Assign a license key from the list and click next.
69. Choose whether to enable lockdown mode (the default is not to) and click next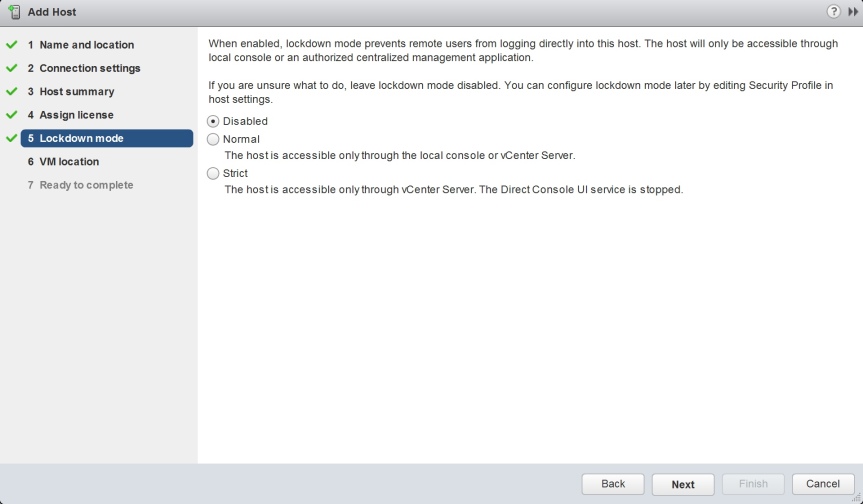
70. Choose the location of your virtual machines by browsing the tree structure. Click next.
71. Review the settings summary and click finish
72. Back on the main homescreen now you should see on the left, your datacentre, cluster and first host. Repeat the steps to add more of all three if required.
73. Now if you expand your hosts you should see the VM’s running on it which you can now manage from vCenter.
Thats pretty much the basics to get a cluster up and running in vCenter. I hope you found it useful.
